How to Create Video Subtitles on YouTube
With billions of users, YouTube is a global video-sharing platform where your content can reach audiences around the world. However, how can your video stand out and attract viewers from many countries, overcoming language barriers? Subtitles are an effective solution. Besides supporting the hearing impaired, subtitles also allow viewers to enjoy videos without turning on the sound, and at the same time help your video easily reach international viewers. Below are the detailed steps to create subtitles for videos on YouTube:
Step 1: Log in to your YouTube account and open YouTube Studio by clicking on your profile picture in the top right corner of the screen, then select "YouTube Studio" or access YouTube Studio HERE
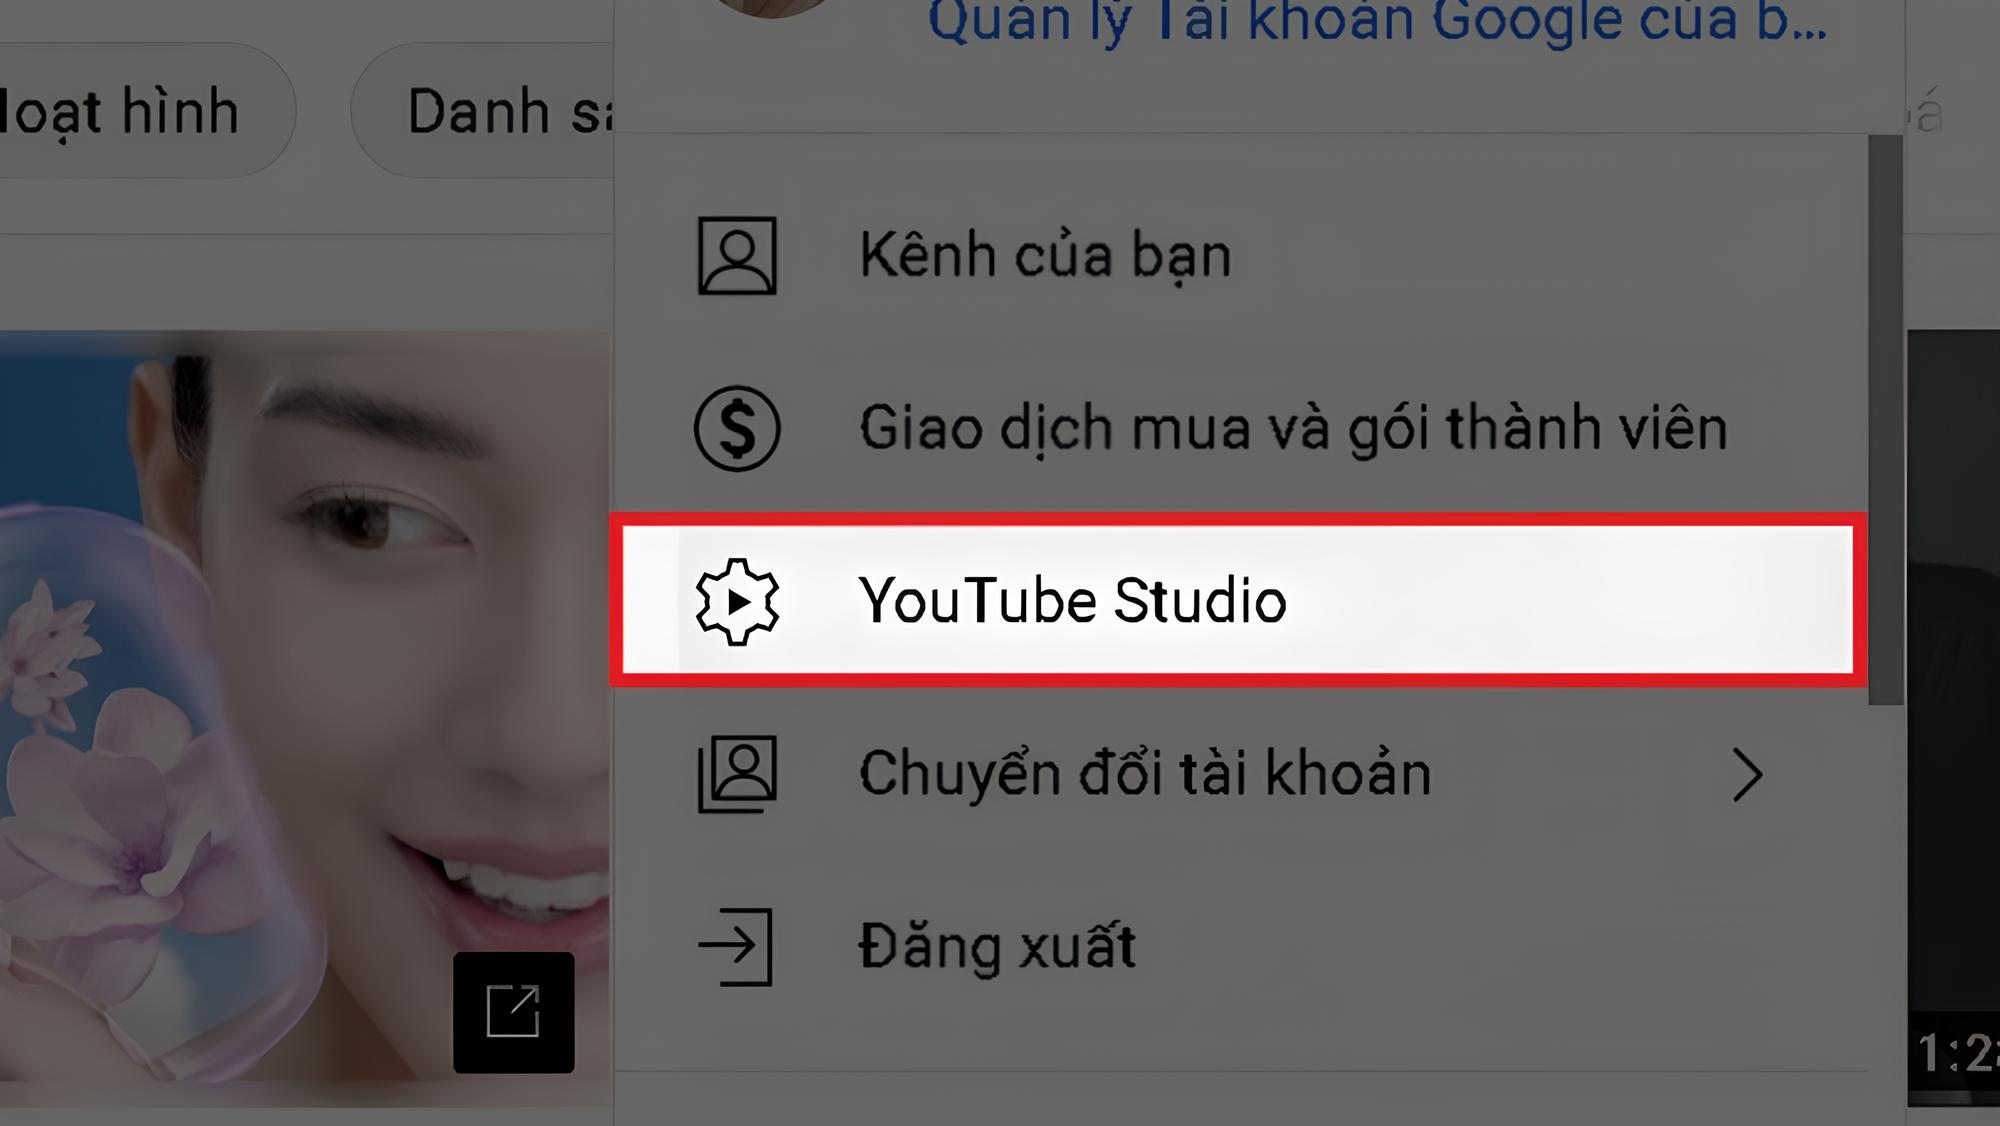
Access the link or click on the YouTube Studio option in the account icon. Step 2: Upload the video you want to create subtitles for to YouTube.
Step 3: On the left toolbar, select the SUBTITLES option, and then select the video you want to create subtitles for.
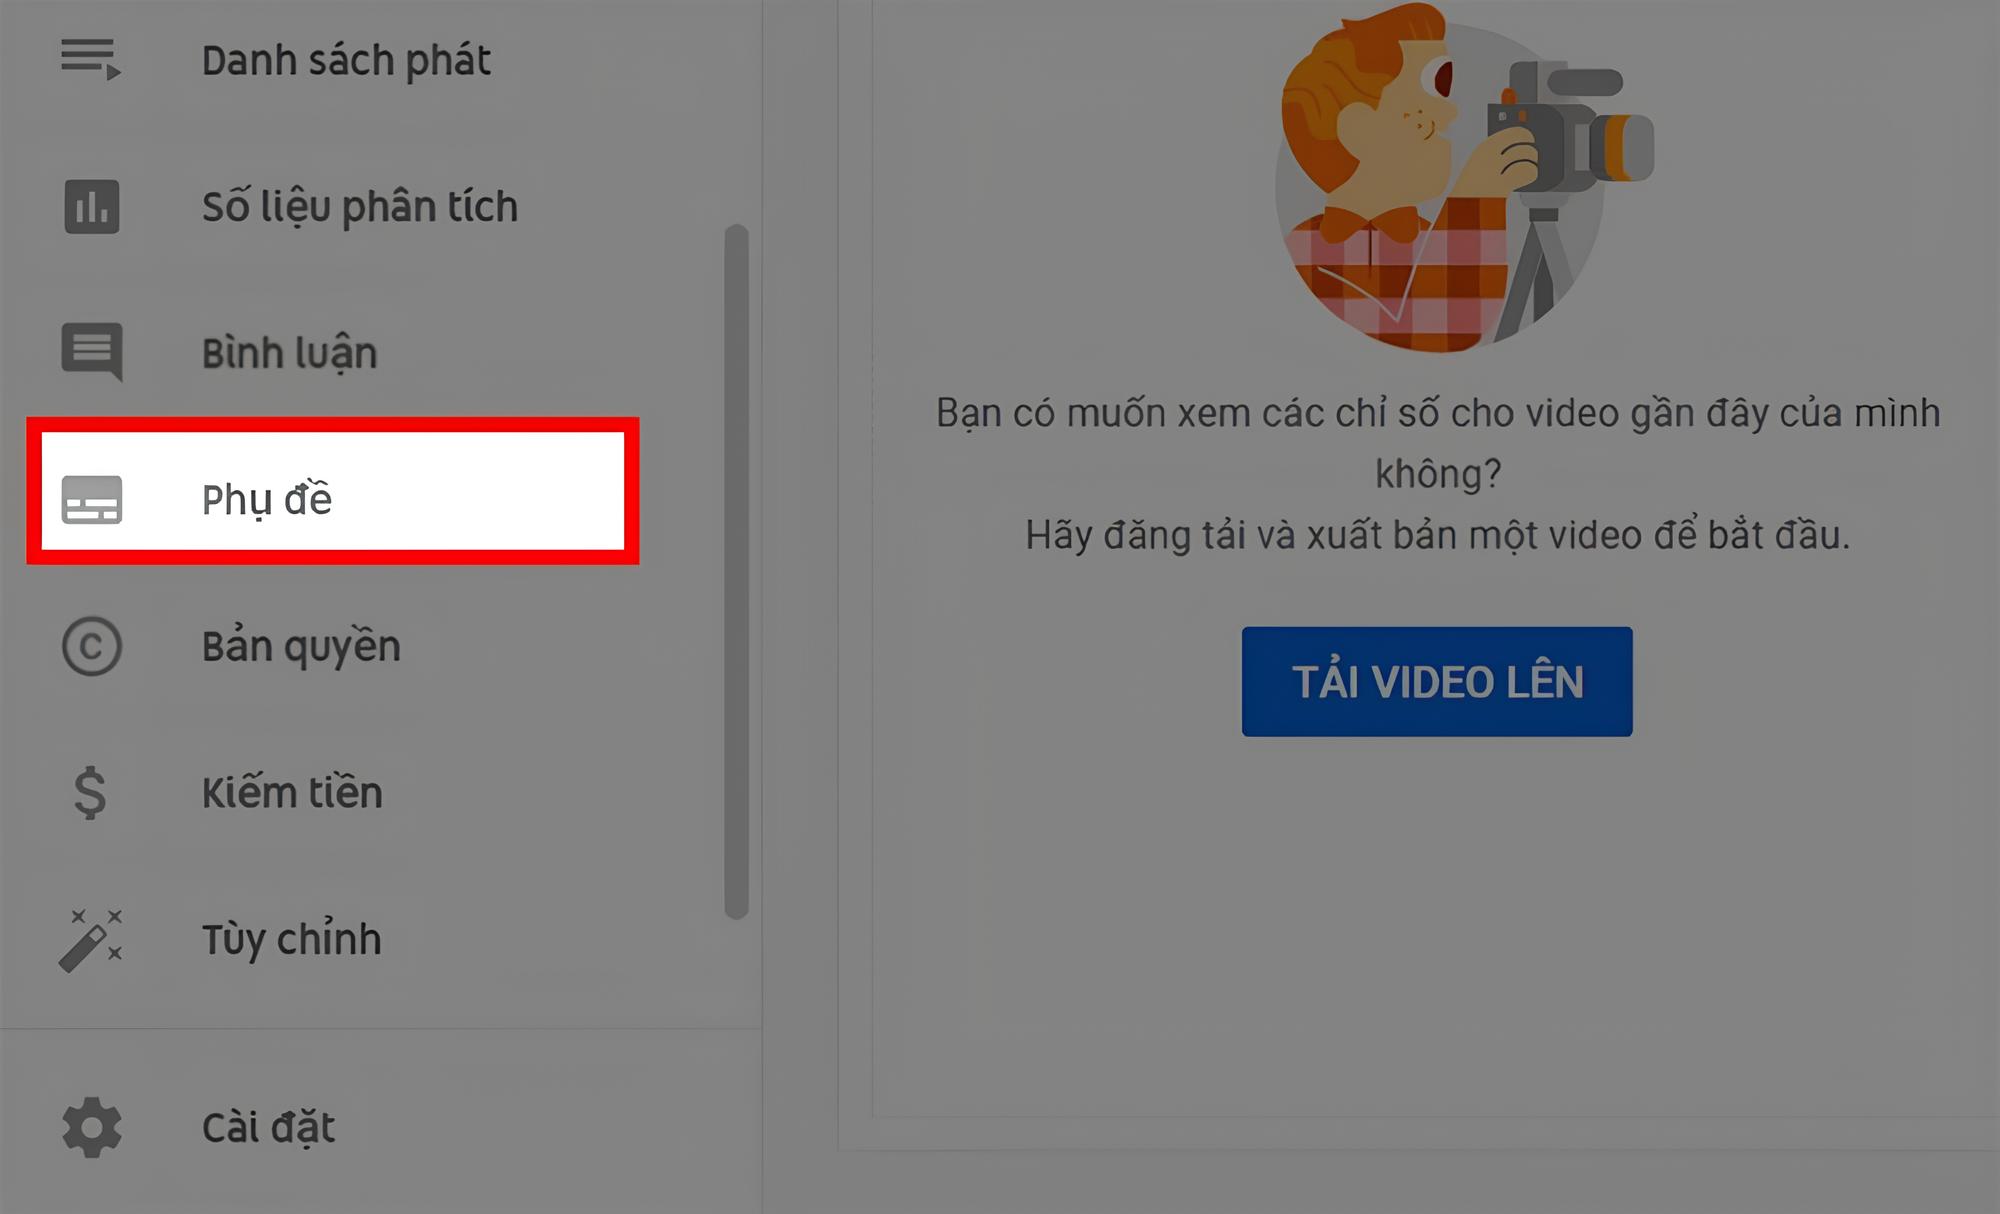
Select the subtitles option.
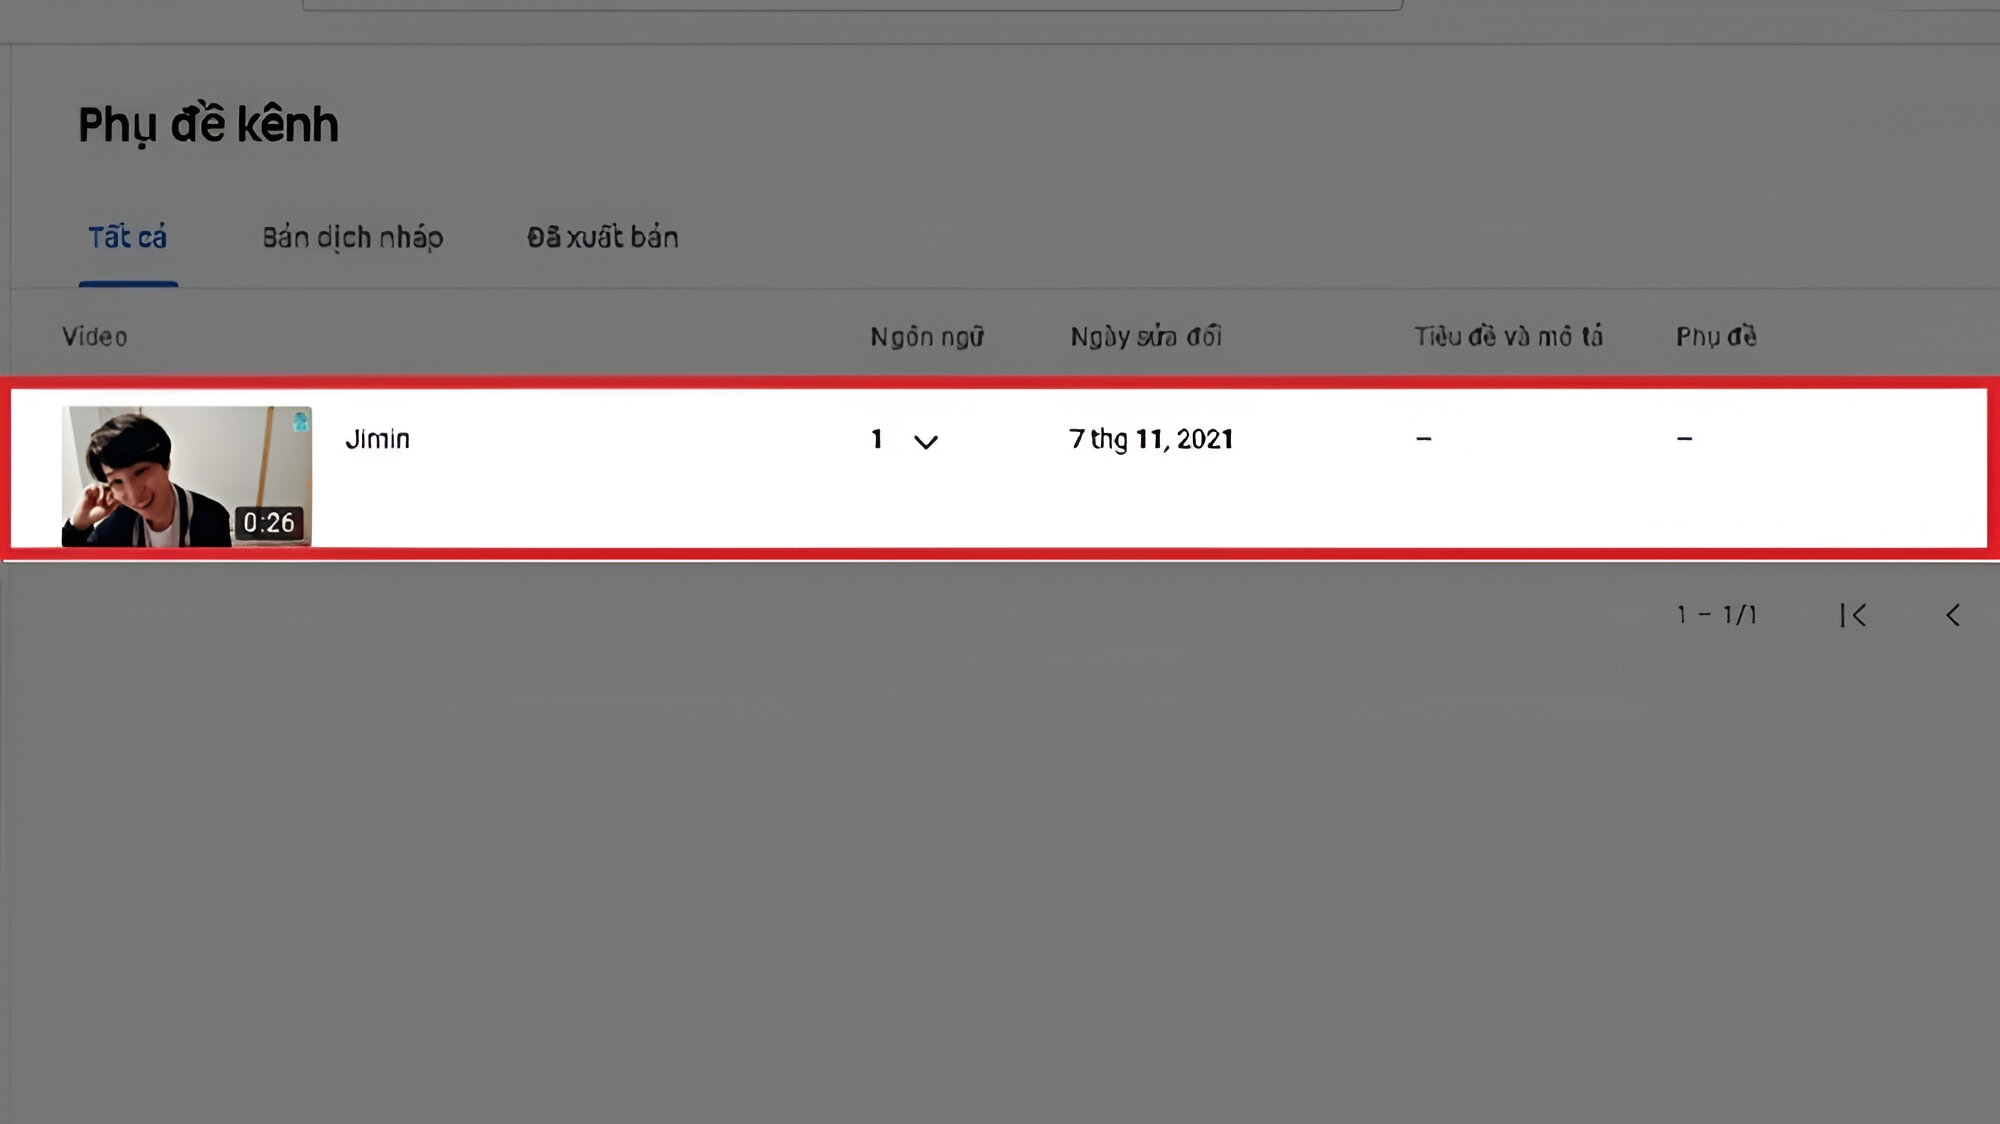
Select the video you want to add subtitles to.
Step 4: Select ADD LANGUAGE > Choose your desired language > Click ADD in the Subtitles column.
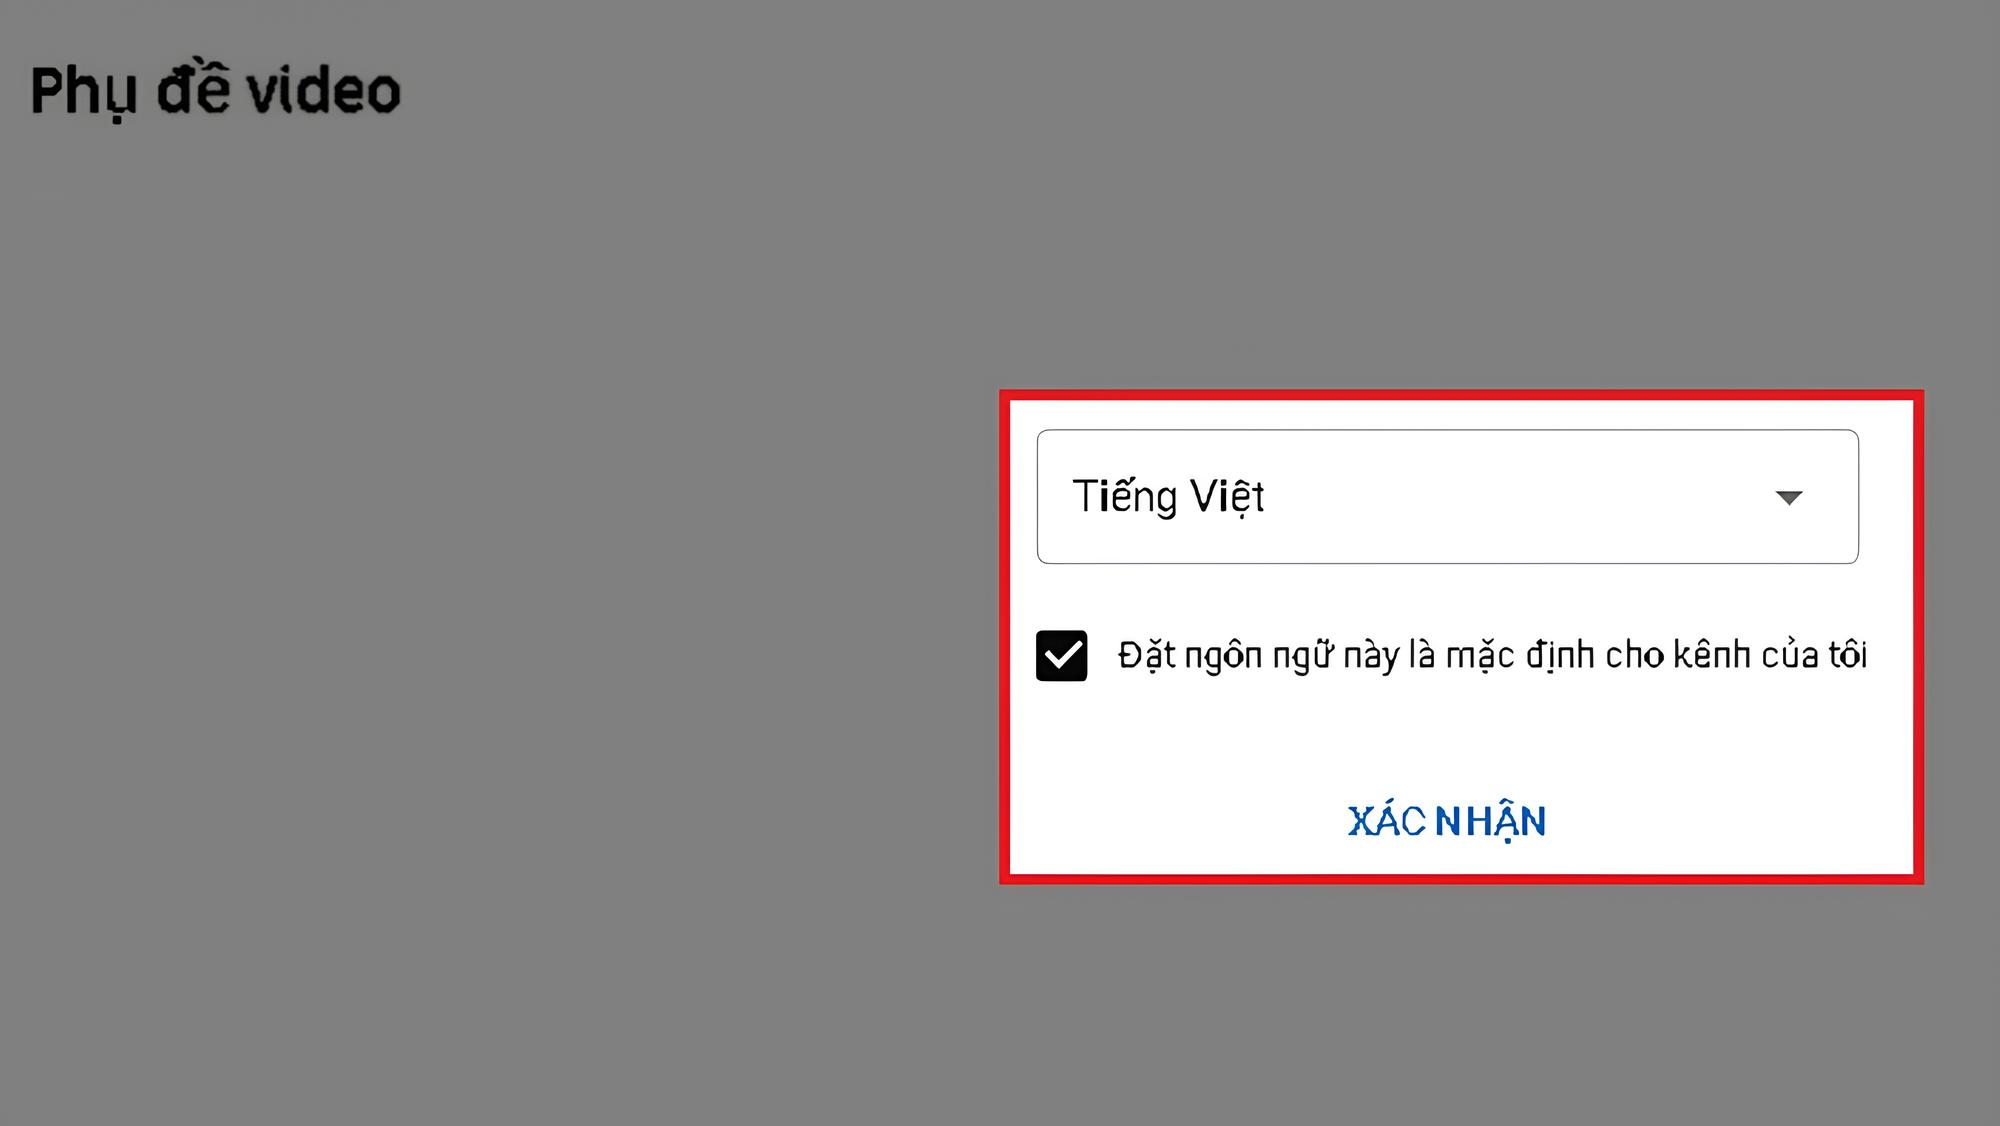
Set the appropriate language and click confirm.
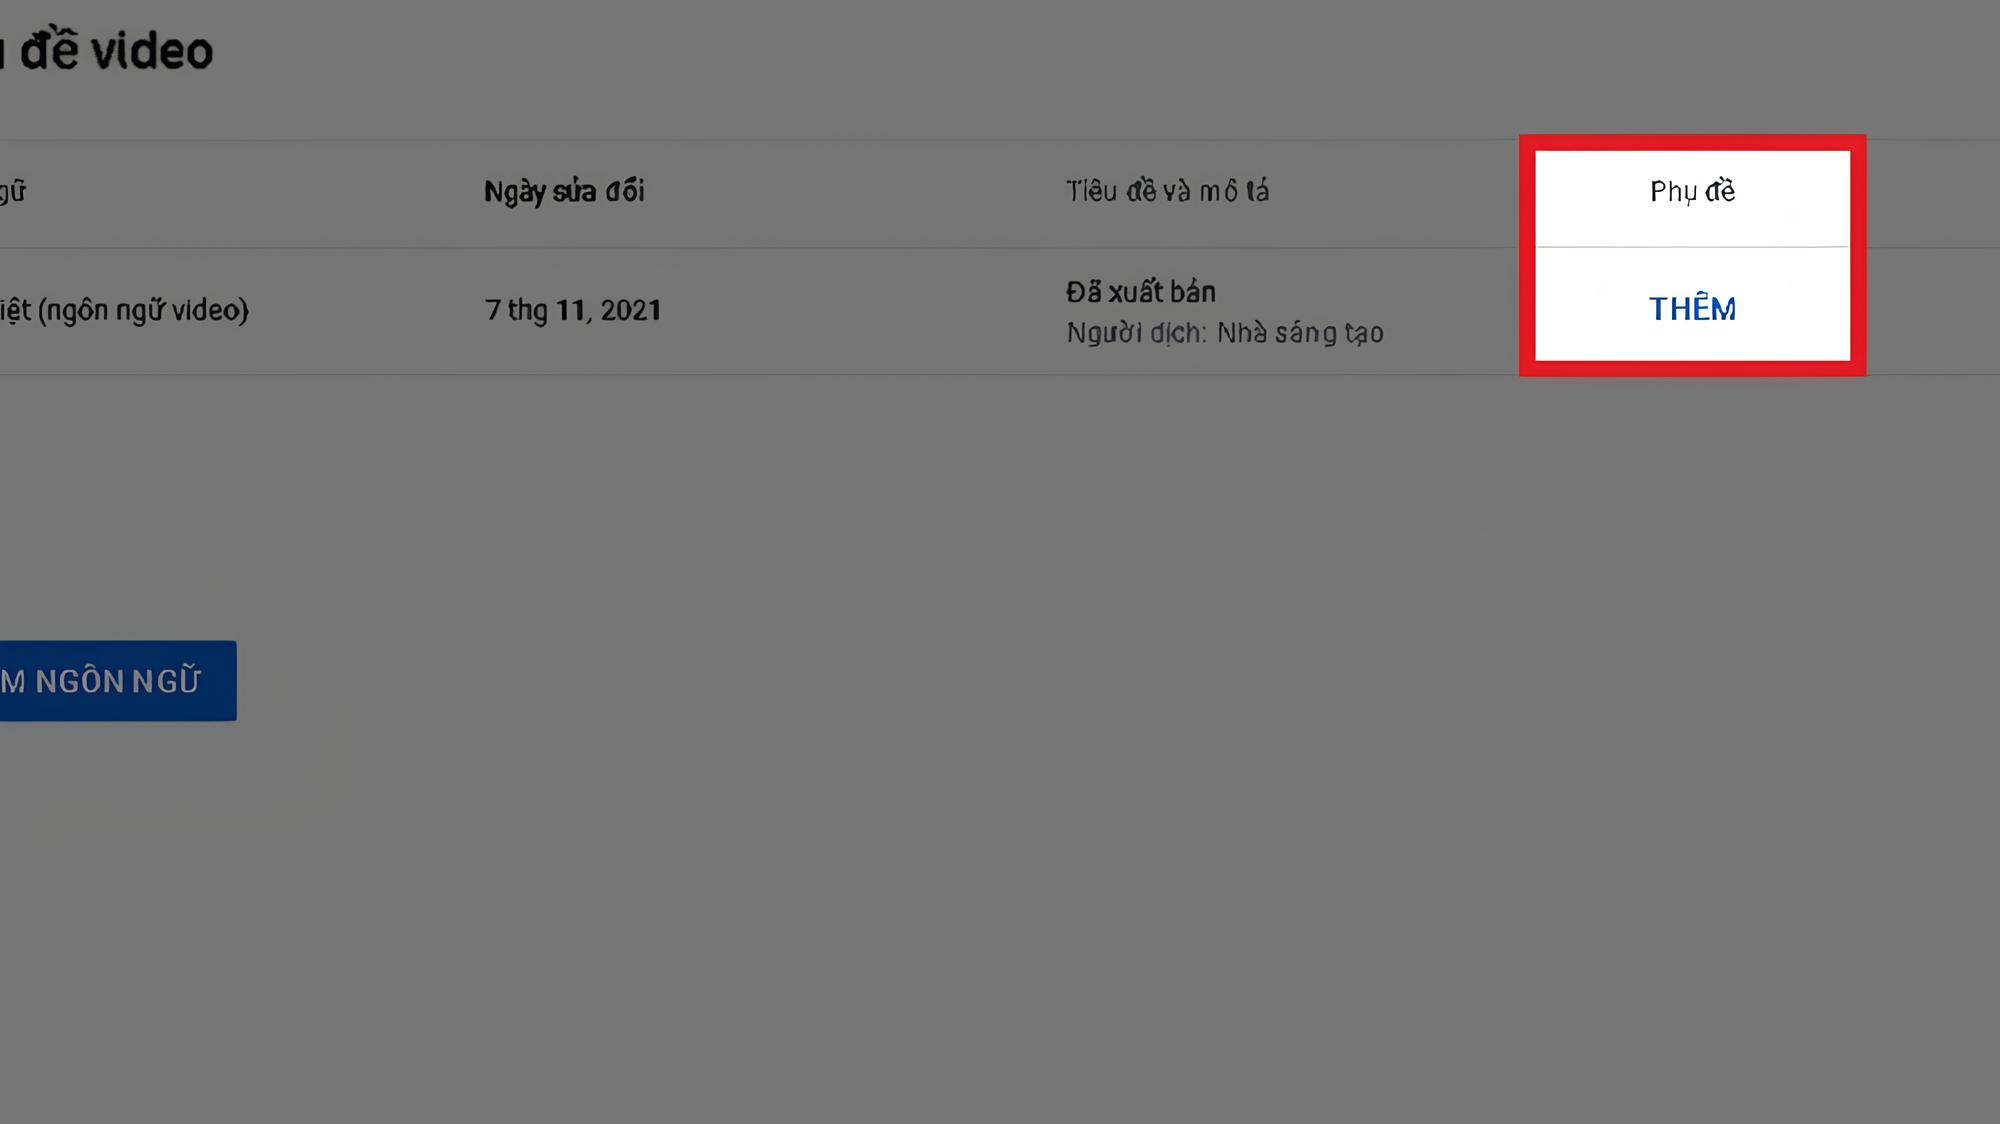
Click Add to insert subtitles
Step 5: Choose one of the following ways to add subtitles:
- Method 1: Upload a subtitle file If you already have a subtitle file (.srt, .vtt, .sbv), you can upload it directly.
- Method 2: Select Manual input Manually enter subtitles and synchronize them with the display time on the video.
- Method 3: Automatic synchronization YouTube will automatically generate subtitles based on the audio in the video. However, you need to check and edit them for accuracy.

Choose the method of entering subtitles.
Step 6: After completing, save the subtitles, and click the PUBLISH button in the top right corner of the screen.
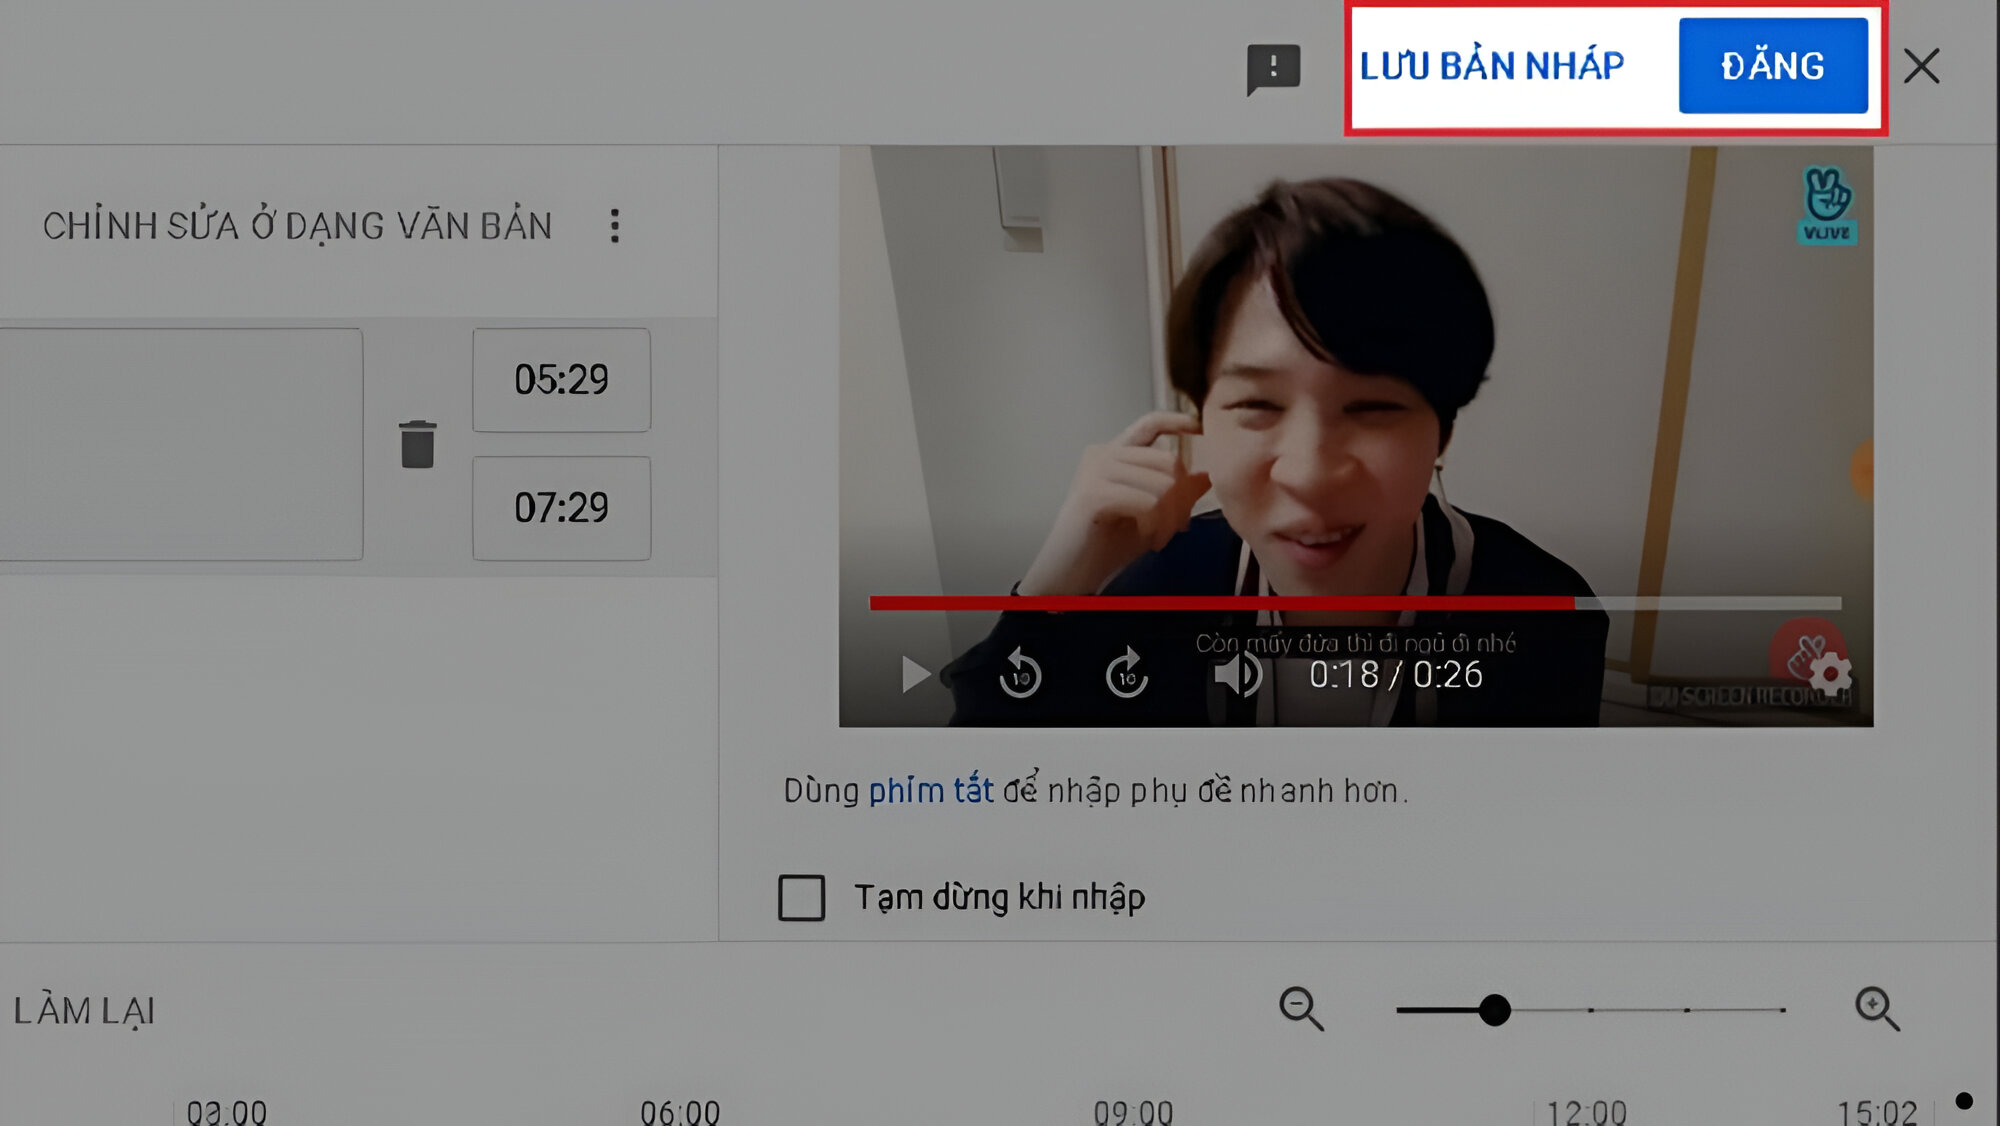
Complete saving and publishing subtitles.
How to Add Subtitles to Videos on Instagram
Instagram is a popular social network for sharing images and short videos. Adding subtitles is a simple and effective way to make your Instagram videos more engaging and reach more viewers. Here are detailed instructions on how to add subtitles to Instagram videos in just a few minutes:
Method 1: Add subtitles directly on Instagram
- Step 1: Open the Instagram app and select the video you want to post.
- Step 2: In the editing step, select "Stickers" and choose the "Captions" sticker.
- Step 3: Enter subtitles and adjust the style, color, and position.
- Step 4: Post the video.
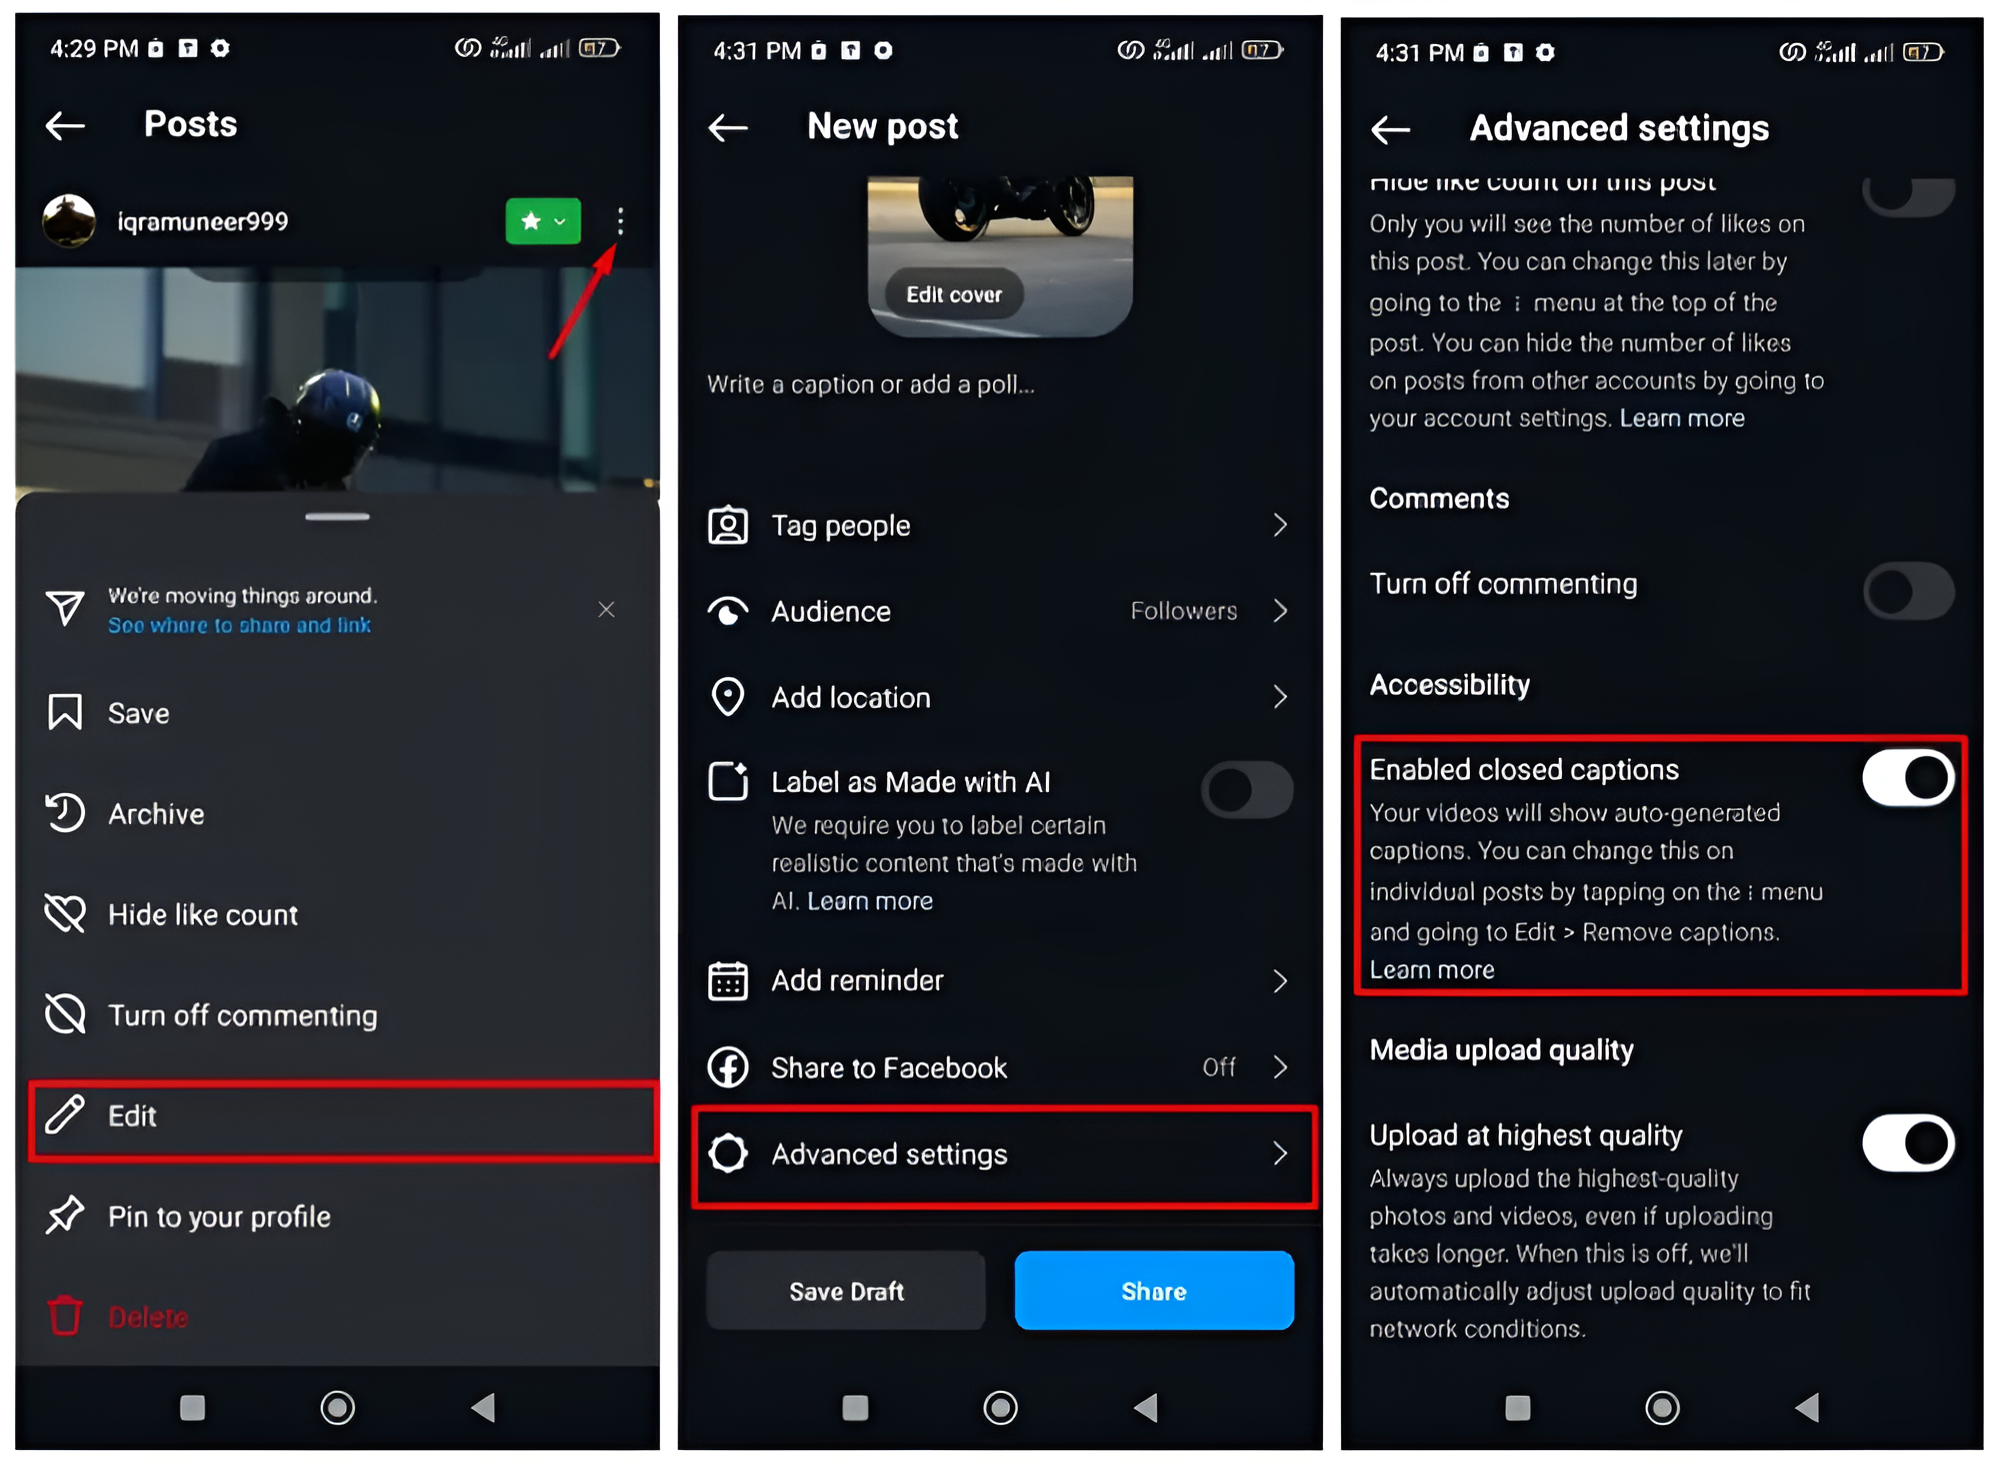
Automatically add subtitles to Instagram videos after posting
Method 2: Use a video editing application
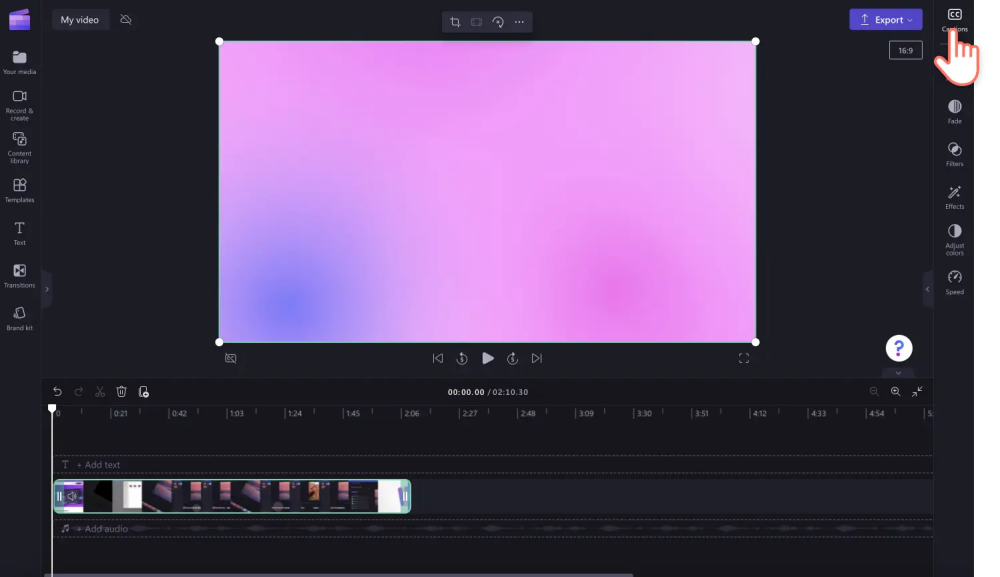
There are many convenient video editing applications that can help add subtitles to videos you upload to Instagram, such as Clipchamp, InShot, CapCut. Below is an example of how to add subtitles to an Instagram video using Clipchamp:
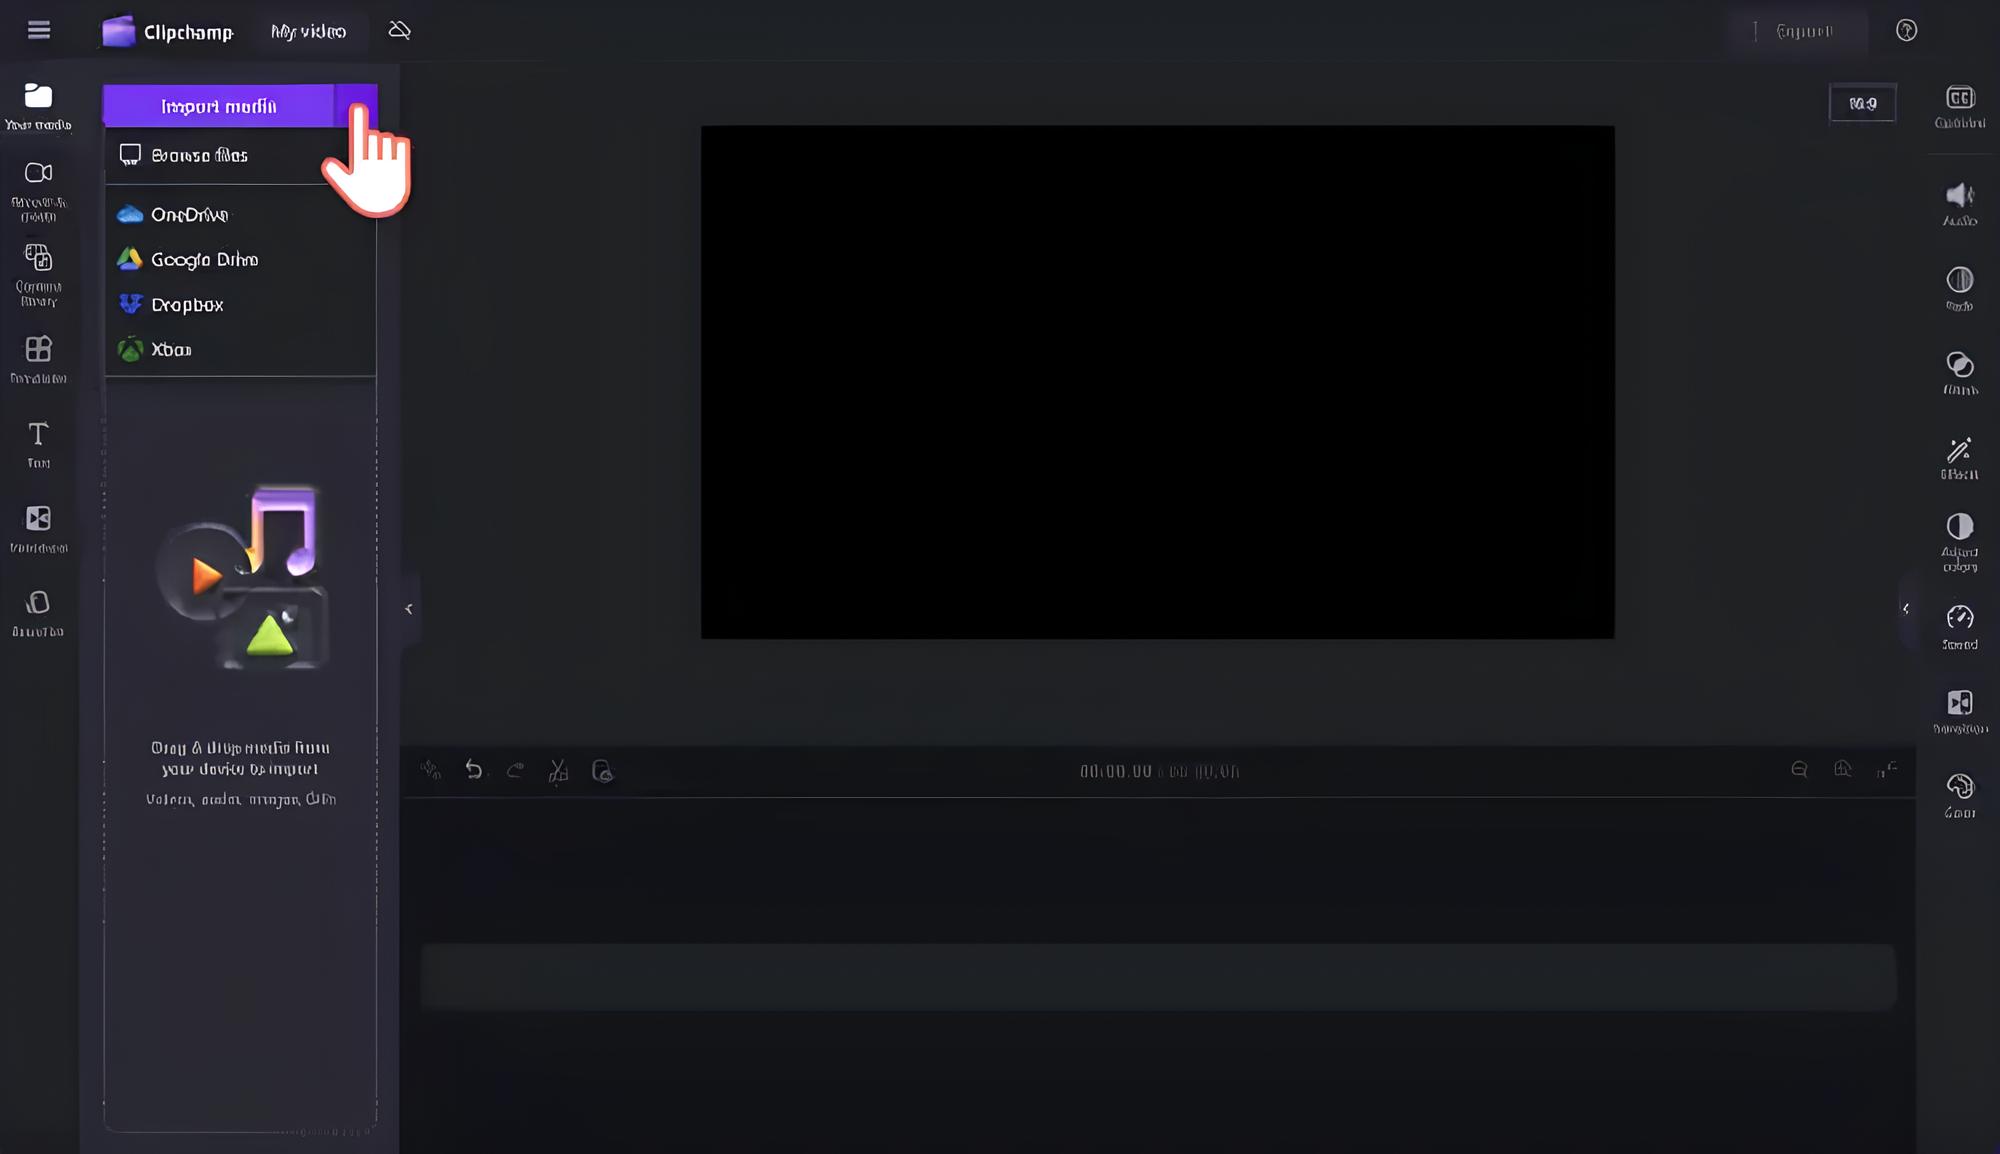
- Step 1: Import video
Start by importing the video you want to add subtitles to into Clipchamp. You can use a pre-recorded video or create a new one from Clipchamp's library of professional footage.
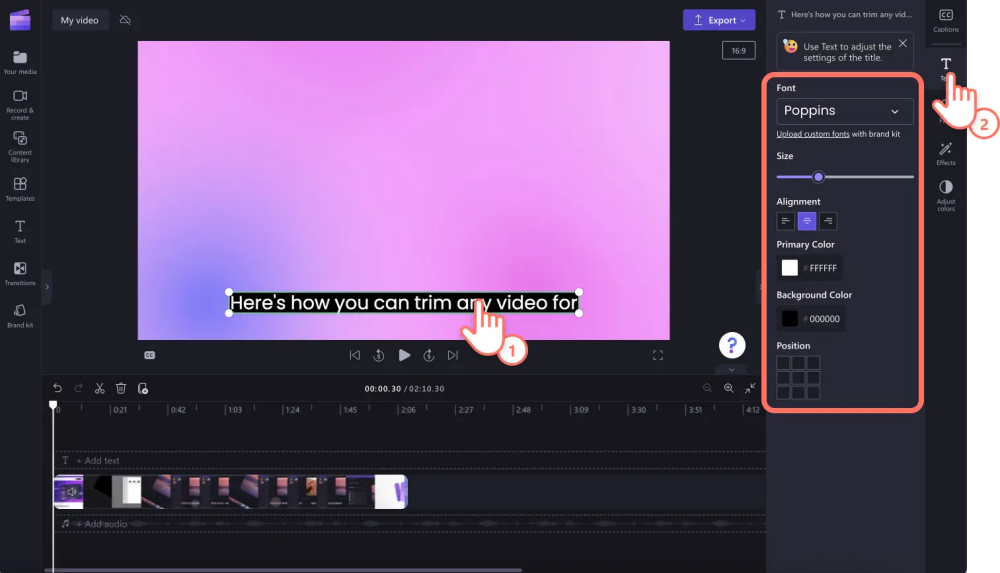
- Step 2: Automatically generate subtitles.
On the editing toolbar, click on the "Subtitles" tab. Then, click the "Turn on auto-captions" button. A new window will appear with options for creating subtitles using AI. Click the "Transcribe media" button to have Clipchamp automatically generate subtitles for your video.
Step 3:
Review and adjust (if necessary). Clipchamp allows you to easily edit the automatically generated subtitles. You can change the content, font, color, size, and position of the subtitles to suit your video.
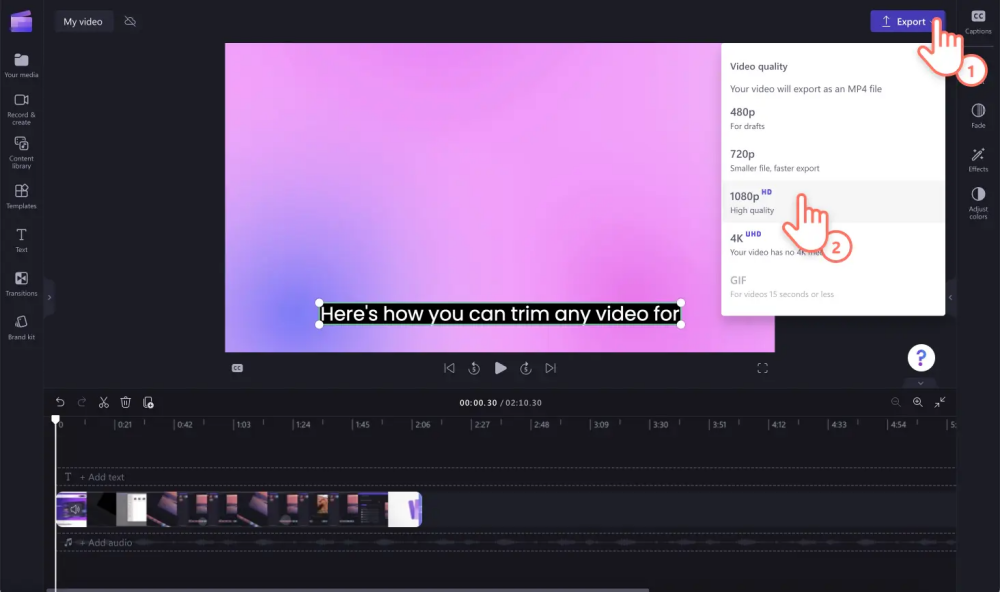
Step 4: Export video.
After completing the adding and editing of subtitles, click the EXPORT button to save the video. Select 1080p resolution to ensure the best video quality when posting to Instagram.
How to Create Subtitles for Videos Using Windows Movie Maker
Besides YouTube Studio, you can also use Windows Movie Maker to create subtitles for videos simply and completely offline. The software interface is very easy to use, even for beginners.
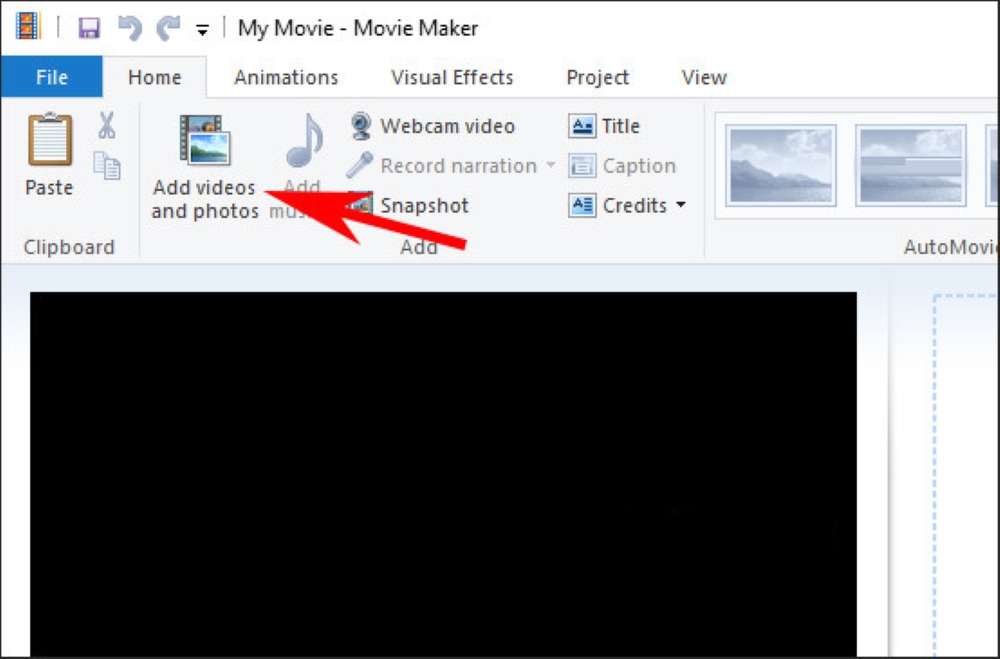
Step 1: Download Windows Movie Maker software. After completion, open Windows Movie Maker software and add the video you want to insert subtitles into by selecting "Add videos and photos".
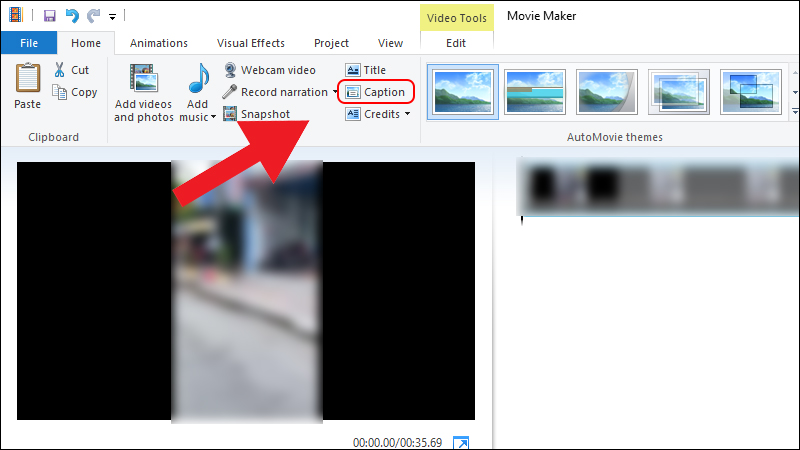
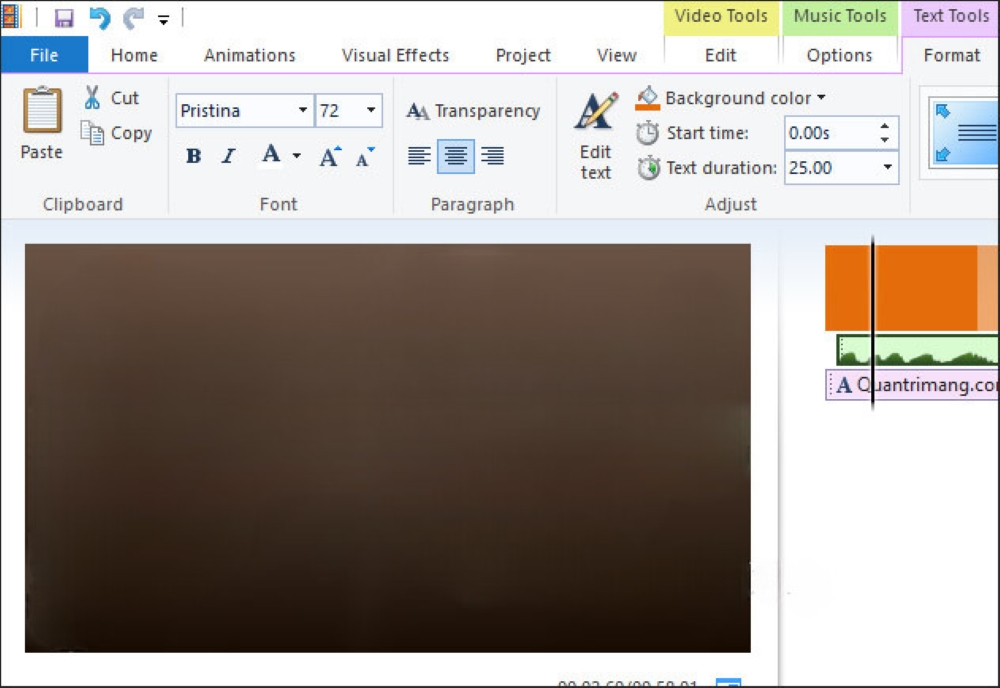
Select the video you want to create subtitles for. Click on Open to open that video. Step 2: On the toolbar, select the Home tab and click Caption. Then, press Enter or click on the subtitle display area on the video to start typing the content. You can customize the font, color, size, and position of the subtitles.
Step 3: Adjust the display time of each subtitle line to match the video content. Make sure the subtitles appear at the right time and long enough for viewers to read.
Step 4: After completing the adding and editing of subtitles, you can save the video by selecting "Save movie" on the "Home" tab.
Here is the English translation:
Adding subtitles to videos not only helps increase accessibility but also improves the professionalism of the content. Above are detailed instructions on how to create subtitles for videos on YouTube, Instagram, and Windows Movie Maker software. To optimize time, you can use Speech to Text tools such as Viettel AI Speech to Text, Google Gboard... to quickly and accurately create scripts with subtitles. Hopefully, this article will help you improve the quality of your videos and attract more views.
Contact Information:
- Hotline: +84 98 1900 911
- Email: viettelai@viettel.com.vn
- Address:
- Hanoi: Ministry of Planning and Investment Building – No. 7 Ton That Thuyet Street, Cau Giay District New Urban Area, Hanoi
- Ho Chi Minh City: 23rd Floor, Viettel Complex Building, 285 Cach Mang Thang Tam Street, Ward 12, District 10, Ho Chi Minh City
- Website: https://viettelai.vn/

Other news


 Hotline: +84 98 1900 911
 Email: viettelai@viettel.com.vn
 D25 Building, Alley 7 Ton That Thuyet, Cau Giay Ward, Hanoi.
23rd Floor, Viettel Complex Building, 285 Cach Mang Thang Tam, Hoa Hung Ward, Ho Chi Minh City.